Writer: Eric Bearing Limited
1. IKO bearing precision improvement method
After the IKO bearing is installed in the host, if the radial runout of the IKO imported bearing spindle is measured, it can be found that the measured value of each revolution has a certain change; when continuous measurement is performed, it can be found that after a certain number of revolutions, this change Will reappear approximately. The index to measure the degree of this change is the cyclic rotation accuracy. The number of revolutions required for the change to reappear approximately represents the "quasi-period" of the cyclic rotation accuracy. The magnitude of the change in the quasi-period is large, which is the cyclic rotation accuracy. .
If the IKO bearing spindle is properly preloaded, the speed will be gradually increased to close to the working speed to implement the "break-in" effect of the bearing, which can improve the cycle rotation accuracy of the spindle.
2. A method to improve the accuracy of IKO imported bearings
A factory produced precision instruments. The main shaft used 6202/P2 type bearings and the accuracy still could not meet the requirements. After thickening the journal and making a raceway on it to replace the inner ring, the steel ball was accurately measured by the size of each Three pieces in a group, each group of steel balls is separated by an interval of close to 120°. Due to the reduction of a heavy processing surface and a reduction of a matching surface, at the same time, the rigidity of the shaft-bearing system is improved, and the maximum three particles and the minimum three particles The nearly equidistant distribution of the steel balls improves the rotation accuracy of the shaft, thus meeting the accuracy requirements of the instrument.
3. Comprehensive verification method for installation accuracy of IKO imported bearings
After the angular contact ball bearing is installed in the main shaft of the IKO bearing, the verification sequence of the installation accuracy is as follows (taking an ordinary lathe with a shaft diameter of 60-100 mm as an example):
(1) Measure the size of the shaft and bearing housing holes to determine the matching accuracy of the bearing. The matching requirements are as follows: the inner ring and the shaft adopt an interference fit, and the interference amount is 0 ~ +4μm (0 at light load and high precision) ; The outer ring and the bearing seat hole adopt a clearance fit, and the amount of clearance is 0 ~ +6μm (but the clearance at the free end of the bearing can also increase the clearance); the roundness error of the shaft and the seat hole surface is less than 2μm, the bearing The parallelism of the end face of the spacer used is less than 2μm, and the runout of the inner end of the shoulder facing the outer end is less than 2μm; the runout of the bearing seat shoulder against the axis is less than 4μm; the inner end of the front cover of the spindle facing the axis is less than 4μm.
(2) Installation of the front bearing at the fixed end on the shaft: the bearing is thoroughly cleaned with clean kerosene. For grease lubrication, an organic solvent containing 3% to 5% grease is first injected into the bearing for degreasing and cleaning, and then used The oil gun fills a certain amount of grease into the bearing (10% to 15% of the bearing space volume); heat the bearing to increase the temperature by 20 to 30°C, install the bearing into the shaft end with an oil press; press the adapter sleeve on the shaft And with a suitable pressure against the bearing end face to axially position; wrap the spring scale tape on the outer ring of the bearing, and use the method of measuring the starting torque to verify whether the specified preload has a large change (even if the bearing is correct) However, due to the deformation of the fitting or cage, the preload may also change).
(3) Install the imported bearing-shaft assembly into the seat hole: heat the seat hole to increase the temperature by 20 to 30°C, and install the bearing-shaft assembly into the seat hole with continuous gentle pressure; adjust the front cover to make the front cover The tightening amount is 0.02~0.05μm, with the outer end surface of the bearing seat as the reference, the dial head of the dial gauge is pressed against the surface of the journal, and the shaft is rotated to measure its runout. The error is required to be below 10μm; locate the dial gauge at On the shaft, the meter head touches the inner surface of the rear seat hole, and the shaft is rotated to measure the coaxiality of the front and rear seat holes of the bearing seat.
(4) Put the free-end bearing selectively in the position that may offset the deviation, and install it in the bearing position behind the bearing seat, as far as possible to offset the mutual roundness deviation and coaxiality deviation.
Cleaning, installation and disassembly of IKO oil-free bearings
The oil-free bearing is an assembly that supports the rotation of the shaft. The ferrules and rolling elements are precision machined. Before the bearings are shipped from the factory, in order to protect the surfaces of the raceways and rolling elements from corrosion, anti-rust oil or grease is injected between the raceways and rolling bodies.
Therefore, the bearings should be cleaned before installation. Bearings sealed with anti-rust oil can be directly cleaned with gasoline or kerosene; if anti-rust with thick oil or anti-rust grease, light mineral oil, such as 10# motor oil or transformer oil, must be heated to dissolve and cool the grease before using gasoline Or kerosene cleaning.
Bearings with dust caps or seals on both sides have been greased before leaving the factory, so there is no need to clean them during installation. IKO bearings coated with dual-purpose lubricating and anti-rust lubricants do not need to be cleaned during installation. During the cleaning and installation process, foreign objects should be strictly prevented from falling into the bearing, because the small abrasive particles will cause wear between the rolling element and the raceway, increase noise and vibration.
There are two main ways to assemble and disassemble oil-free bearings. One is to press the interference ring into the shaft or into the bearing seat hole; one is to increase the inner diameter of the bearing by heating the bearing, or to reduce the outer diameter of the bearing by cooling, and easily install the bearing on the shaft or push it into the seat Inside the hole. When the pressurization method is adopted, the mechanical force or hydraulic pressure directly acts on the seat ring to be disassembled through a special device, and the disassembly force is never allowed to be transmitted through the rolling body. Otherwise, it will cause indentation of the raceway and rolling element surface, increase noise and vibration and cause damage.
If the heating or cooling method is used for assembly and disassembly, the heating temperature or cooling temperature should be strictly controlled. Because the strength of the bearing working surface is affected by the metallographic structure of the metal surface, too high temperature will cause a tempering effect; too low temperature will cause embrittlement of the metal surface. Generally, the heating temperature should not exceed 100°C, and the minimum cooling temperature must not be below minus 50°C. At the same time, the heating should be considered uniform.
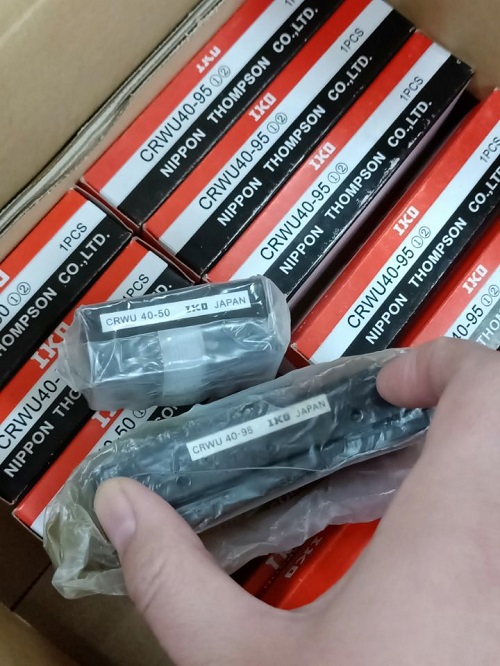
Practice has proved that improper installation of oil-free bearings is one of the causes of premature bearing damage. The assembly and disassembly of the ferrule with interference is very difficult, so when designing the support, we must consider how to install and disassemble the IKO bearing and facilitate the assembly and disassembly. For the assembly and disassembly of large bearings of heavy machinery, special equipment is often required. If the high-pressure oil is disassembled, the oil circuit, pipeline and pump should be designed accordingly. IKO CRWU4-50 bearings online , pls click here :
IKO bearing disassembly and assembly skills maintenance method
1. Loosen the bolts securing the bearing housing. Remove the bearing together with the bearing seat from the shaft. Note before removing the bearing housing at one end of the shaft. The bearing seat bolts at the other end of the shaft should be loosened to prevent the bearings at both ends from being stiff and damaged.
2. Use an Allen wrench to loosen the locking screw on the bearing eccentric sleeve, and then use a small iron rod to insert the counterbore on the eccentric sleeve of the top cover, and loosen the eccentric sleeve against the rotation direction of the shaft.
Many people use improper installation methods in the installation of IKO bearings, resulting in damage to the bearings. So how to install the bearings correctly? I hope you can have a more comprehensive understanding of the installation and disassembly of bearings:
For bearing rings with clearance fits, it is recommended to apply a thin layer of anti-creep corrosion agent to the mating surfaces to prevent frictional corrosion between the mating surfaces.
Correct installation is very important for the use of IKO bearings. I hope you can use the correct installation method in future use.
When installing, you can choose mechanical, heating or hydraulic methods according to its type and size. The force applied to the bearing during installation must not be transferred from one bearing ring to another through the rolling element, otherwise it may cause damage to the raceway. However, under no circumstances should you directly strike the bearing rings, cages, rolling elements or seals.
3. Install eccentric sleeve. First put the eccentric sleeve on the eccentric step of the bearing inner sleeve, and tighten it by hand along the rotation direction of the shaft. Then insert or hold the small iron rod into the countersink hole. Use a hammer to strike the iron rod in the direction of rotation of the shaft. Install the eccentric sleeve firmly, and finally tighten the hexagon socket screws on the eccentric sleeve.
4. Do not tighten the bolts to fix the bearing housing, but to allow the bearing jacket to rotate in the bearing housing. Then tighten the bearing seat bolts. Also install the other end bearing and seat on the same shaft, turn the shaft a few times, and let the IKO bearing itself find the correct position automatically.
5. Apply lubricating oil to the mating surfaces of the bearing housing and bearing, and install the bearing into the bearing housing. Then put the assembled bearing on the shaft together with the bearing seat. Push to the desired location to install.
6. Before installing the bearing on the shaft, you must first remove the fixing pin of the bearing jacket, at the same time polish the surface of the journal smooth and clean, and apply oil to prevent rust and lubricate the journal (allow the bearing to rotate slightly on the shaft).
Maintenance considerations
1. Tear off the seal of the bearing seal and remove the bayonet on the shaft;
2. Wipe the residual oil in the bearing with a clean tissue or soft cloth, and then wipe the shaft;
3. Put a little butter in the bearing, the principle is that it is better not to have less, so as not to seriously affect the speed;
4. Cut the aluminum skin of the canister as big as the outer diameter of the bearing bayonet, and dig a small hole in the middle that can just pass through the shaft, place it between the bearing and the bayonet, reduce The distance that the small bearing moves axially and parallelly. If the gap is large, it is necessary to pad a few thickenings to make the bearing's forward and backward movement distance below 0.5mm;
5. Seal the oil seal, add a little butter, and finally put the fan back on the graphics card. Try it after connecting to the power supply, you will find that the sound is much quieter, and it can be used for at least 2 years. But it should be reminded that although the sound is lower, because of the limited precision of the manual, the speed will drop slightly.
Tel: 00852-30697500
Fax: 00852-30697511
Email: sales@ericbearing.com
Message: Click Here Message!